
🚀Accelerate Next.js Deployment with AWS Amplify: Terraform and CI/CD for Reliable, Scalable Apps


Table of contents
In this tutorial, we will walk through the process of deploying a Next.js sample application on AWS Amplify.
This project utilizes Terraform to automate the creation of an AWS Amplify app resource and map git branches to it.
AWS Amplify is a powerful platform that simplifies the deployment and hosting of web applications, providing features such as automatic CI/CD pipelines and scalable infrastructure.
🔮Prerequisites
Before getting started, make sure you have the following prerequisites:
Configure the AWS credentials: Set up the AWS access key and secret key using environment variables, AWS CLI, or shared credentials file.
Terraform is installed on your local machine.
💻Getting Started
To use this Terraform code, follow the steps below:
Clone the repository to your local machine:
https://github.com/imswapnil99/aws_amplify_infraChange into the project directory:
cd aws_amplify_infraUpdate the Terraform variables:
Open the
dev.tfvarsfile and modify the values of the variables according to your requirements. Update the values for the following variables:var.app_name: The name of the AWS Amplify app.var.repository_url: The URL of the repository associated with the app.var.access_token: The access token for authentication.var.platform: The platform on which the app is built.var.custom_rule_source,var.custom_rule_status,var.custom_rule_target: Custom rule details for path redirection.var.branch: The name of the branch to be mapped to the Amplify app.var.framework_name: The framework used in the branch.
Configure the Amplify provider:
- In the
provider.tffile, add the following code to configure the Amplify provider:
- In the
    terraform {
      required_providers {
        aws = {
          source  = "hashicorp/aws"
          version = "5.4.0"
        }
      }
    }

    provider "aws" {
      region = "ap-south-1"
    }
- Define the Amplify App:
- Below the provider configuration, add the following code to define your Amplify App:
- Define IAM role for Amplify deployment:
The code includes two additional AWS resources related to IAM roles and policies:
aws_iam_roleandaws_iam_role_policy.The
aws_iam_rolethe resource represents an IAM role for Amplify deployment with the following properties:
# Create an IAM role for Amplify deployment
resource "aws_iam_role" "amplify_role" {
  # Name of the IAM role
  name = "amplify_deploy_terraform_role"

  # Assume role policy document specifying which service can assume this role
  assume_role_policy = <<POLICY
{
  "Version": "2012-10-17",
  "Statement": [
    {
      "Effect": "Allow",
      "Principal": {
        "Service": "amplify.amazonaws.com"
      },
      "Action": "sts:AssumeRole"
    }
  ]
}
POLICY
}

# Attach a policy to the IAM role
resource "aws_iam_role_policy" "amplify_role_policy" {
  # Name of the IAM role policy
  name   = "amplify_iam_role_policy"
  # ID of the IAM role to which the policy is attached
  role   = aws_iam_role.amplify_role.id
  # Content of the policy from a file
  policy = file("amplify_role_policies.json")
}
Initialize Terraform:
terraform init
Review the Terraform plan:
terraform plan --var-file=dev.tfvarsThis step validates the Terraform configuration and displays a summary of the changes that will be applied.

Apply the changes and provision the infrastructure:
- If the planned changes look correct, apply them by running the following command:
    terraform apply --var-file=dev.tfvars
                or
    terraform apply --var-file=dev.tfvars --auto-approve
Type "yes" when prompted to confirm the changes or we can use
--auto-approve. Terraform will provision the necessary resources on AWS.
Wait for the deployment to complete:
Terraform will now provision the Amplify infrastructure based on the configuration you defined.
Click on the
Run Buildonce.
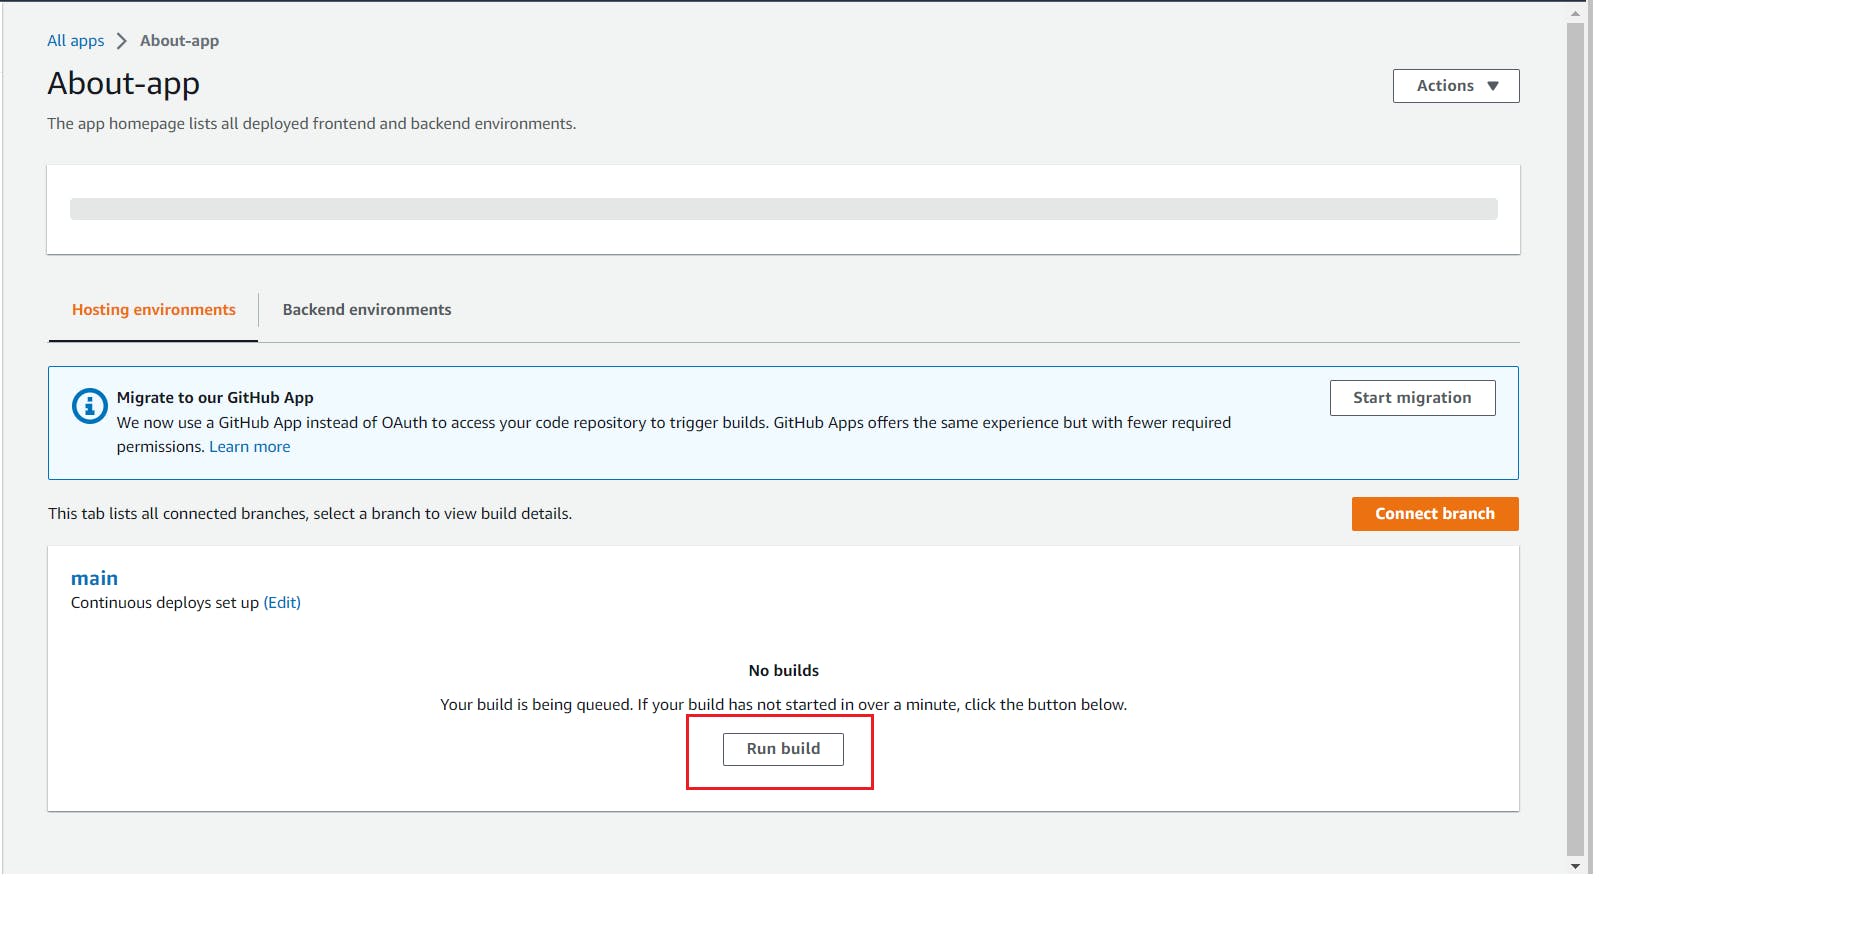
Wait for Terraform to complete the provisioning process. It may take a few minutes.
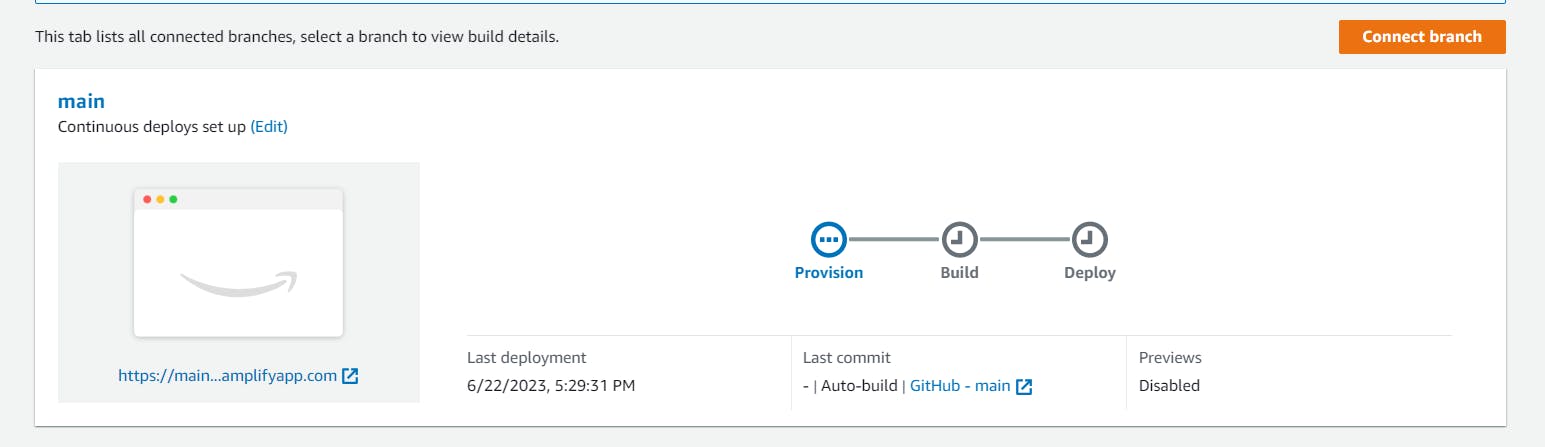
Verify the resources:
Once Terraform completes, you can verify the provisioned infrastructure by checking your AWS Amplify Console in the AWS Management Console.
TRY Next.js App:Next App(will be working for till 25th june.)
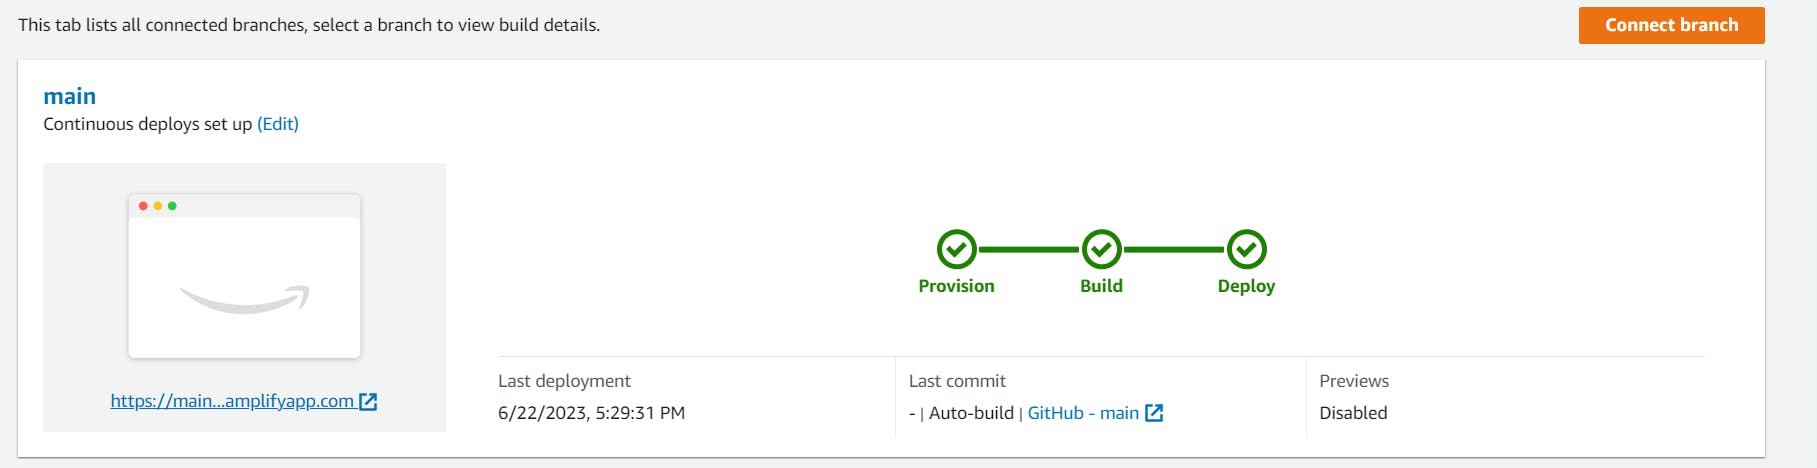
Ensure that your Amplify App is created and configured correctly.
Once the deployment is complete, you can verify that the AWS Amplify app and IAM role have been created successfully by checking the AWS Management Console or using the AWS CLI.
CI/CD pipeline with Amplify’s inbuilt functionality:
Make a change to your application's code and push the changes to the connected branch in your repository.
Amplify will automatically detect the changes and trigger a new build and deployment.
Monitor the progress in the Amplify Console and ensure that the changes are deployed successfully.
That's it! You have now set up a CI/CD pipeline with Amplify's inbuilt functionality.
Amplify will automatically build and deploy your application whenever changes are pushed to the connected branch, providing a seamless deployment experience.
Cleanup (optional):
To destroy the resources created by Terraform and clean up the environment, run the following command:
terraform destroy --var-file=dev.tfvars
Confirm the destruction of the resources by typing "yes" when prompted.
🎮Contributing
Contributions to this project are welcome. If you find any issues or have any suggestions for improvements, feel free to open a pull request or create an issue in the repository.
✨Conclusion
By following the steps outlined in this Blog, you can easily set up an AWS Amplify app using Terraform. This provides a streamlined and automated approach to provisioning the necessary resources for deploying your web application on AWS Amplify.
If you encounter any issues or have any questions, please feel free to open an issue or reach out to our support.